

How To Use
ScriptStar brings text-based editing to Final Cut Pro.
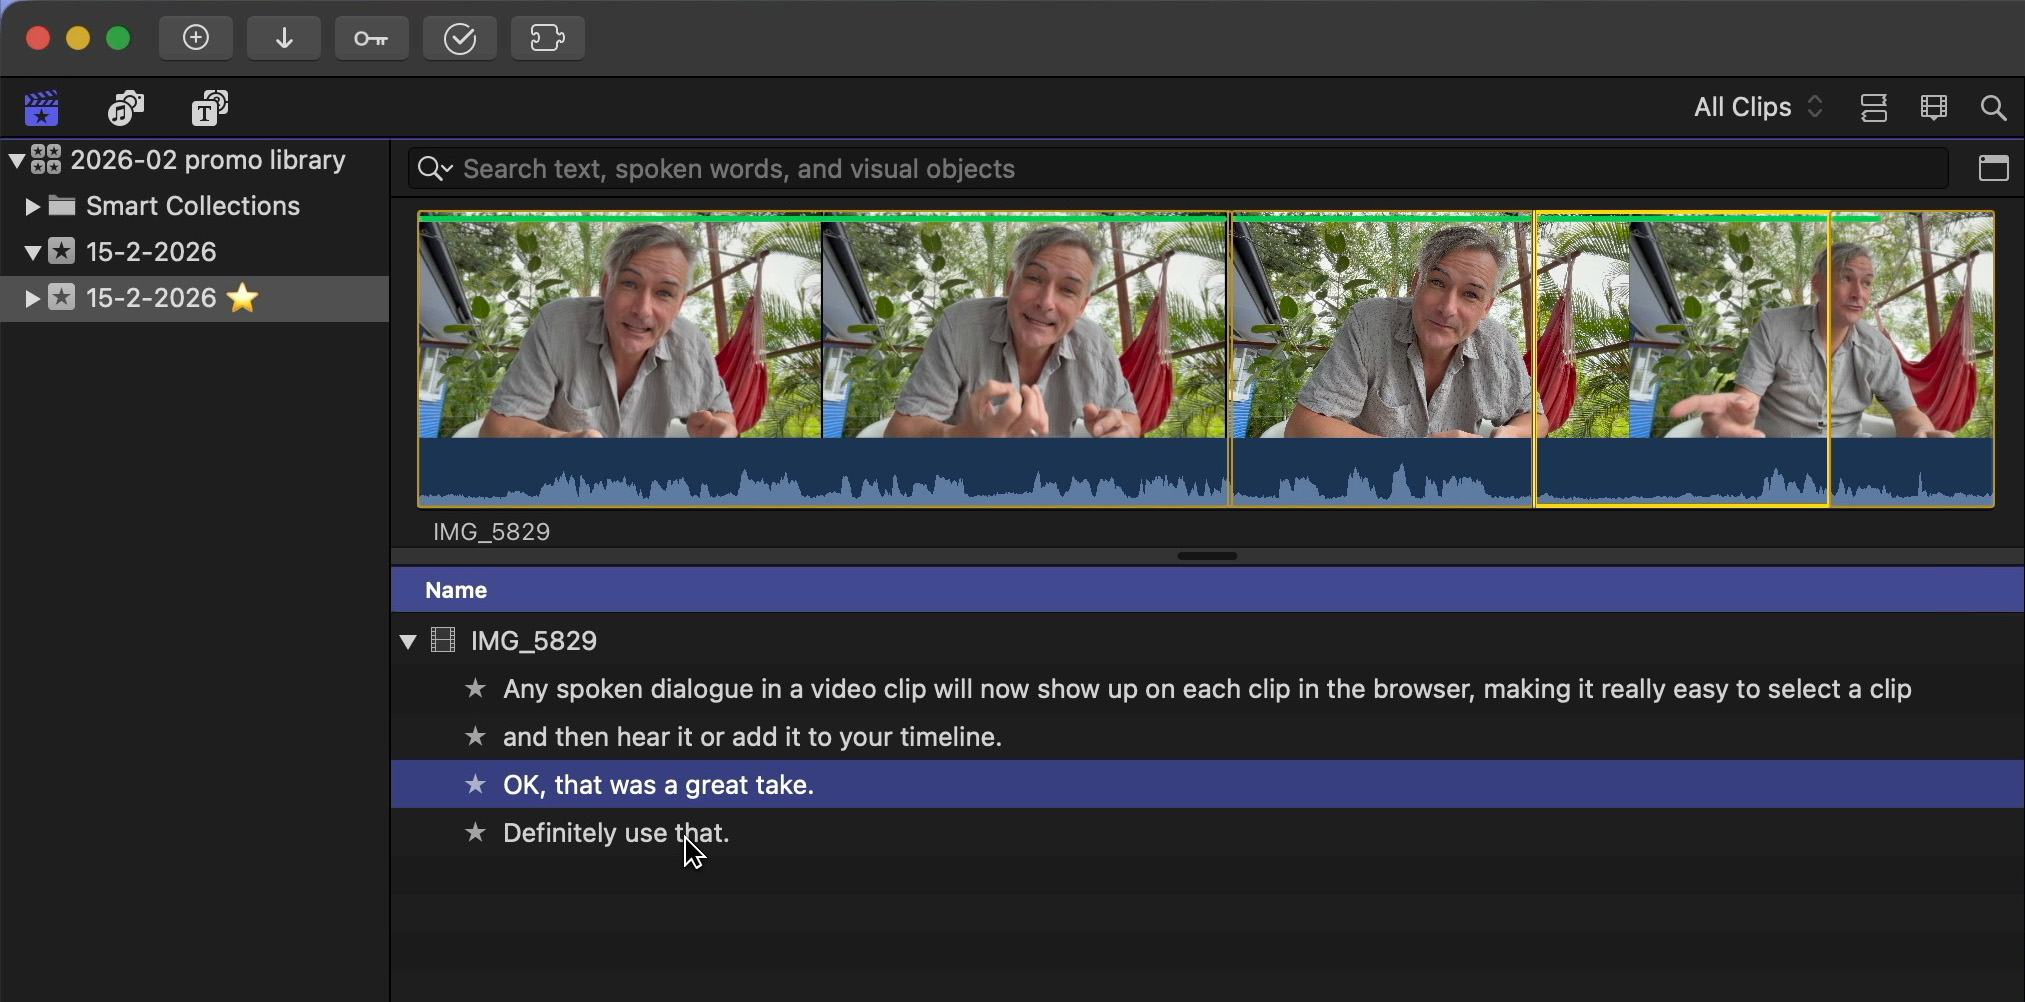
It converts Final Cut Pro’s built-in transcripts into named favorite ranges on the same browser clips. This lets you see exactly what was said, instantly select it, and add it to your timeline.
Intro Video
Instructions
The below documentation is for ScriptStar v1.6. While ScriptStar is still designed mostly for use with Final Cut Pro, if all you need is transcription, you can also work directly with audio and video files. For more information on this, skip to the "Using ScriptStar without Final Cut Pro" section near the end of the page.
To start using ScriptStar with FCP, import your clips into a Final Cut Pro library as usual, and organize them into events if you like.
By default in Final Cut Pro v12 (lifetime/perpetual) and Final Cut Pro Creator Studio v12 (subscription), Transcribe in English is enabled by default.
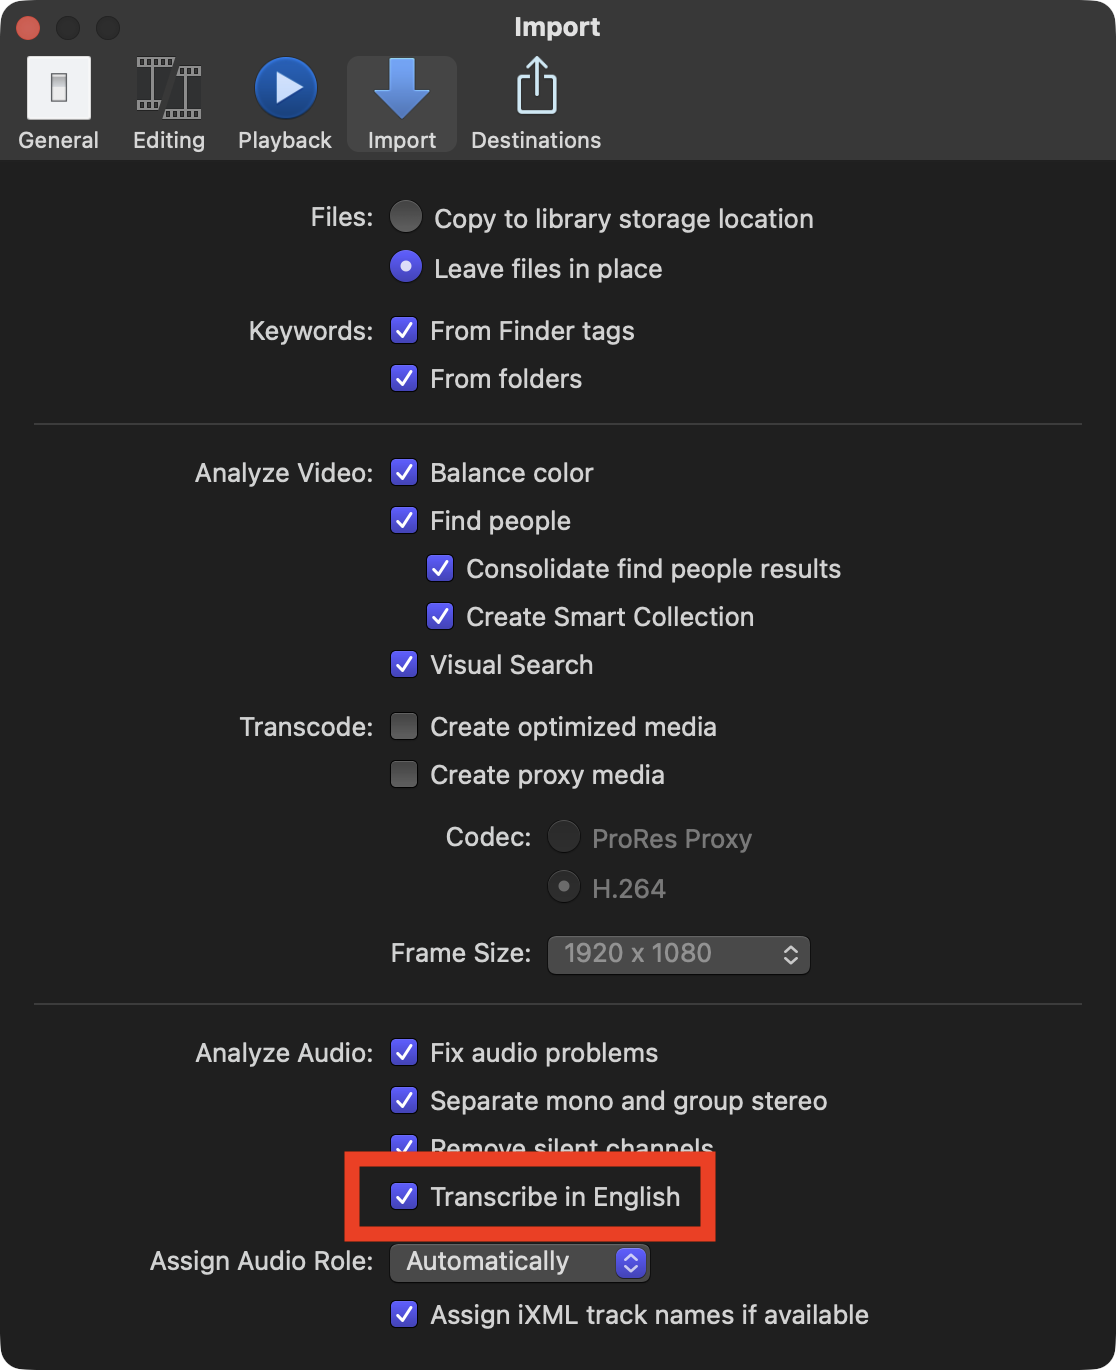
ScriptStar uses this transcription data. However, if you didn't transcribe your clips on import (which will be the case if your library was created before FCP 12) then you can transcribe them now if you wish. Select one or many clips, right-click, choose Analyze and Fix, and check Transcribe in English in the dialog that appears.
However, If you'd prefer to use your own transcripts, which is necessary for non-English captions, you can provide SRT files that will be used in place of the built-in transcripts, or New in v1.5, transcribe in ScriptStar instead. Many languages are supported.
Launch ScriptStar
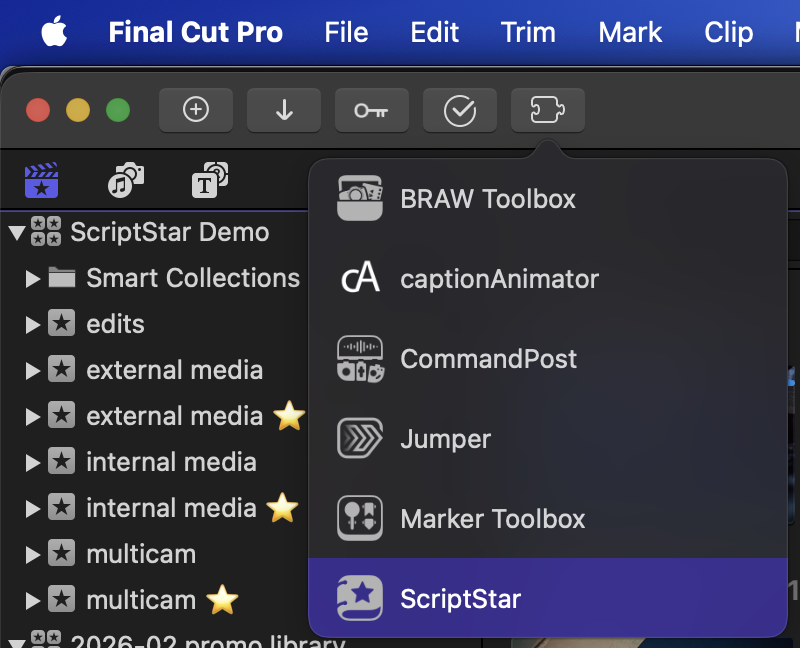
With clips transcribed, you can now launch ScriptStar from either your /Applications folder, or via the Final Cut Pro Workflow Extensions button in the toolbar and menubar.
Drag a Library or Event(s) to ScriptStar
Once launched, simply drag your Final Cut Pro Library or one or more Final Cut Pro Events from the Final Cut Pro Browser interface into the drop zone in ScriptStar to get started.
-
If you dragged one or more Events, you will now have to locate the Final Cut Pro library in the Finder — the Library's location isn't included in data dragged from Events.
-
If you dragged in a Library, you will also need to locate the Library in the Finder, but the location will be chosen for you, and this process is only needed the first time you work with a new Library. (This is necessary due to sandboxing requirements.)
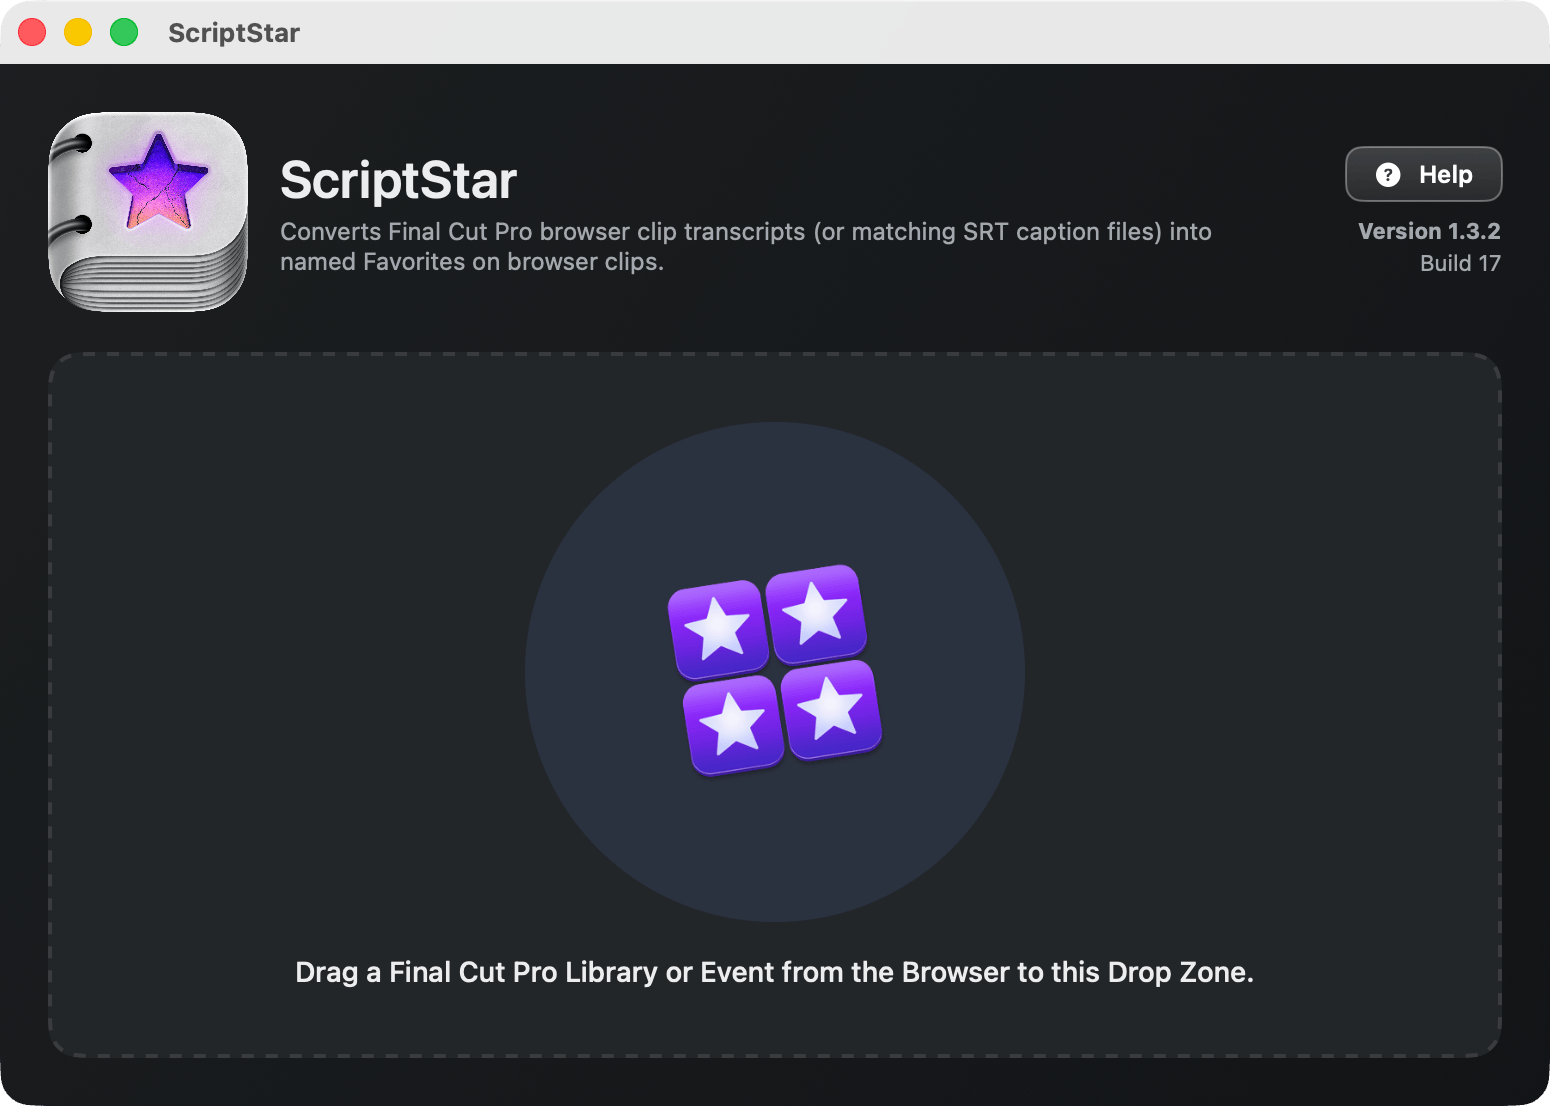
To recap, you first need to drag the Final Cut Pro Library or Event to ScriptStar from the Final Cut Pro interface, and then, if asked, locate the Library in the Finder.
Which should you choose to drag in, a Library or an Event?
- In most circumstances, we recommend dragging a Library. The process is simpler, and as ScriptStar is told the location of the Library, you can save a step. However, if you're working with larger Libraries, dragging in just one or two of your Events may process more quickly.
- Working with Events can also avoid some issues we've seen with FCP. Specifically, if you have some kinds of PDFs stored in your Library, you may not be able to export and then re-import an FCPXML file of that Library back into Final Cut Pro — even if you don't use ScriptStar at all! This issue impacts ScriptStar's Library-level processing, so if you have problems working with Libraries, try just one Event (containing transcribed interviews) instead.
Choose one or move Events to process
If you've chosen a Library, or more than one Event, you should now choose the Events you want to process, then press Continue.
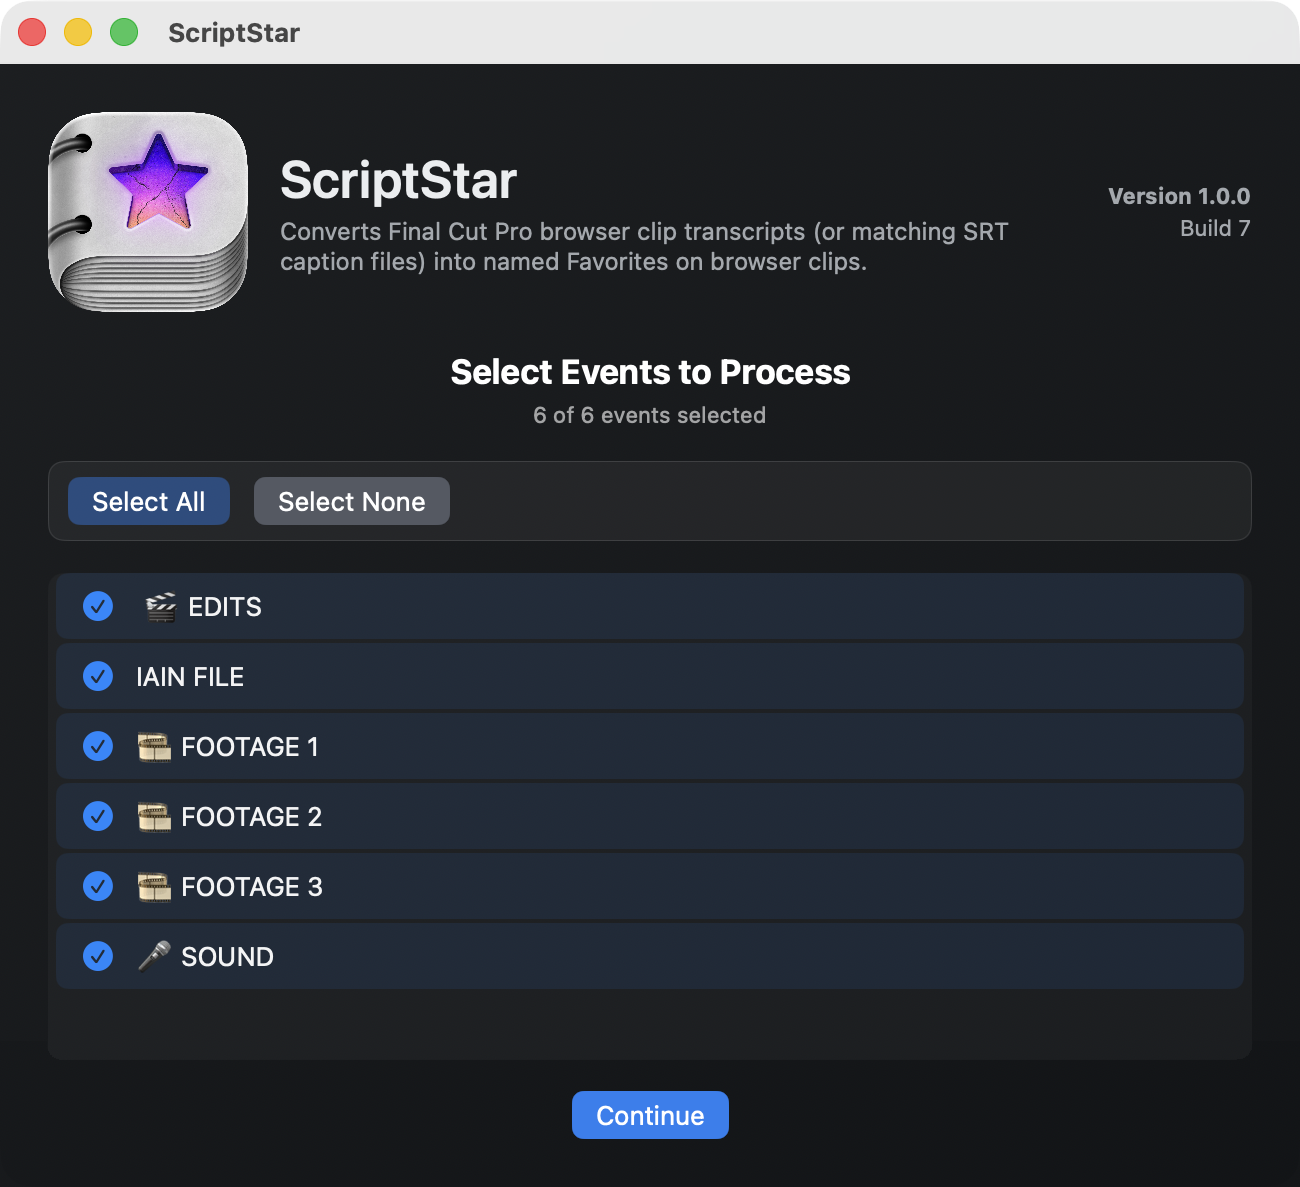
Optional: Add SRT files, perform new transcriptions, and/or choose alternative workflows
Transcription and SRT support is great for foreign languages, if you’ve had clips transcribed or edited by humans, or if Final Cut Pro’s transcript hasn’t worked or has poor results.
At this point, you can replace any of the built-in transcripts by dragging in SRT files that match the names of any of your existing clips.
New in v1.5
You can also choose to create a new transcript for any or all clips. Click the "New Transcript" column header to transcribe all clips, or check just some of the boxes in that column to transcribe only some clips.
Multicam clips can be selected explicitly here, and the audio angle selected in the Info Inspector is the angle that will be transcribed.
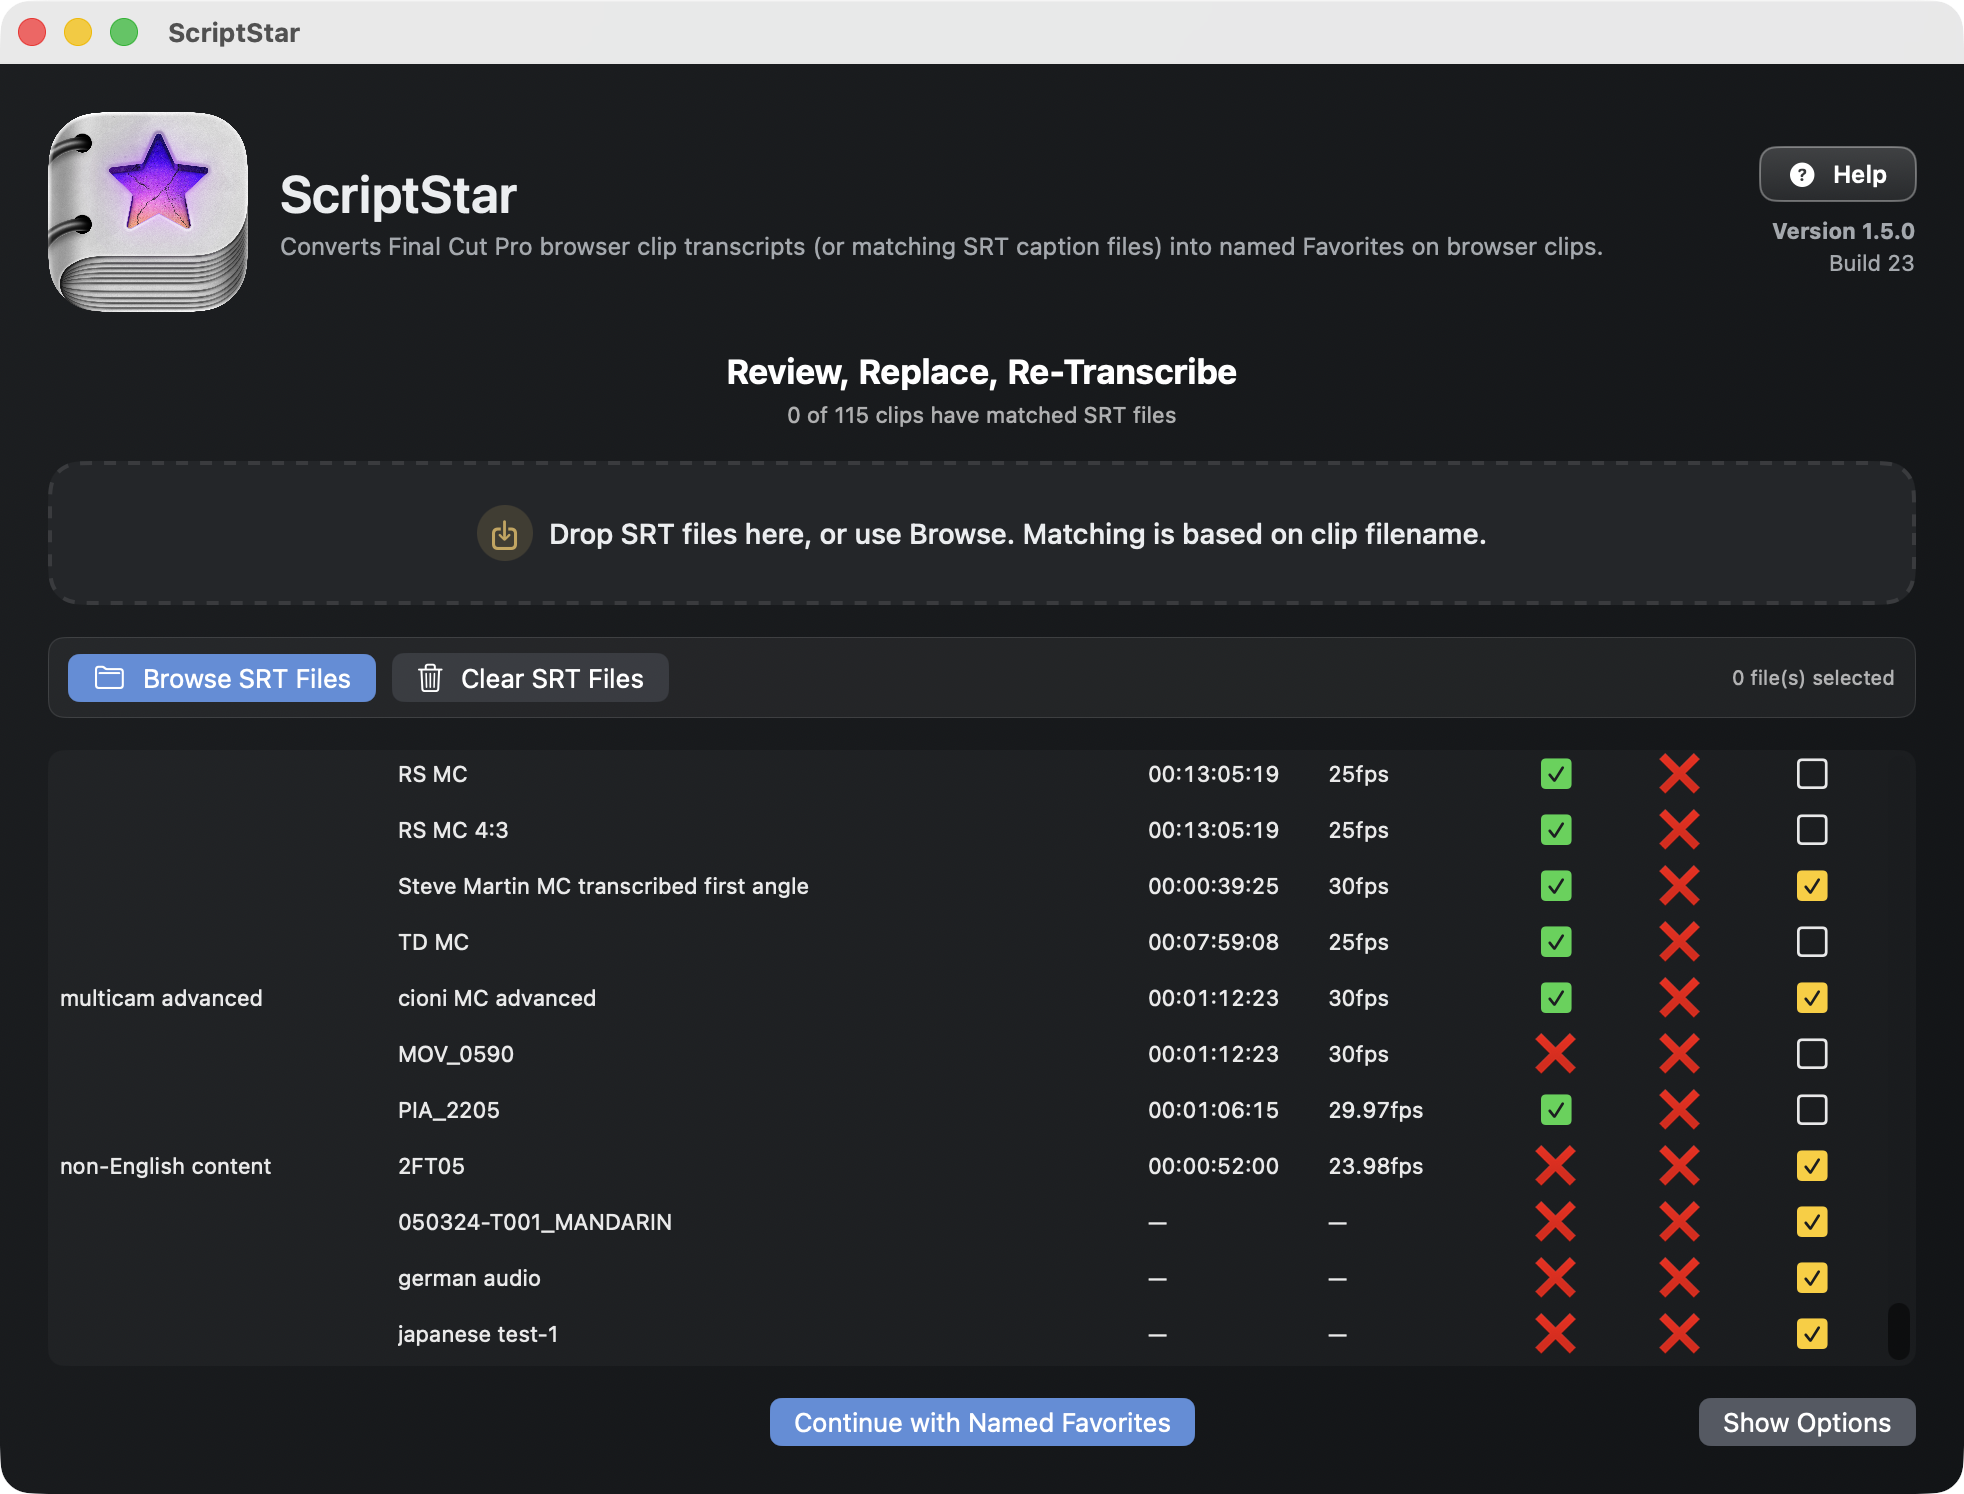
All transcriptions are created locally, on your Mac, and no files ever leave your machine.
Transcription can be performed by the Parakeet or Whisper open-source models. Click Show Options and choose which model to use at the top of this panel. If this is the first time you've used a model, it will be downloaded automatically. The Apple transcription model is the same one used by Final Cut Pro, but we've found it less accurate than the other models.
We recommend Parakeet for English and most European languages — it's very fast, and the timing is more accurate than the other models, making it easier to use its output for text-based editing. Whisper is slower, but supports a wider range of Asian languages.
New in v1.6.1
If you're using Whisper for transcription, you can optionally choose which language you're using. This can help with some cases where the correct language isn't correctly detected, or when more than one language is spoken.
Press Continue to perform the transcription on selected clips before sending named favorites back to Final Cut Pro.
If transcription fails for any clip, a warning will be shown. This can happen because a clip doesn't include any recognisable audio, or if the language spoken cannot be recognised by the model chosen. For example, if you've tried to transcribe Mandarin audio with Parakeet, it will fail. In this case, you may wish to change to the Whisper model and try again.
Clips that failed to transcribe will now be de-selected, so if you're happy to skip the clips that failed, you can simply press Continue once more to go ahead with selected clips. Any clips that have already been transcribed will not need to be processed again.
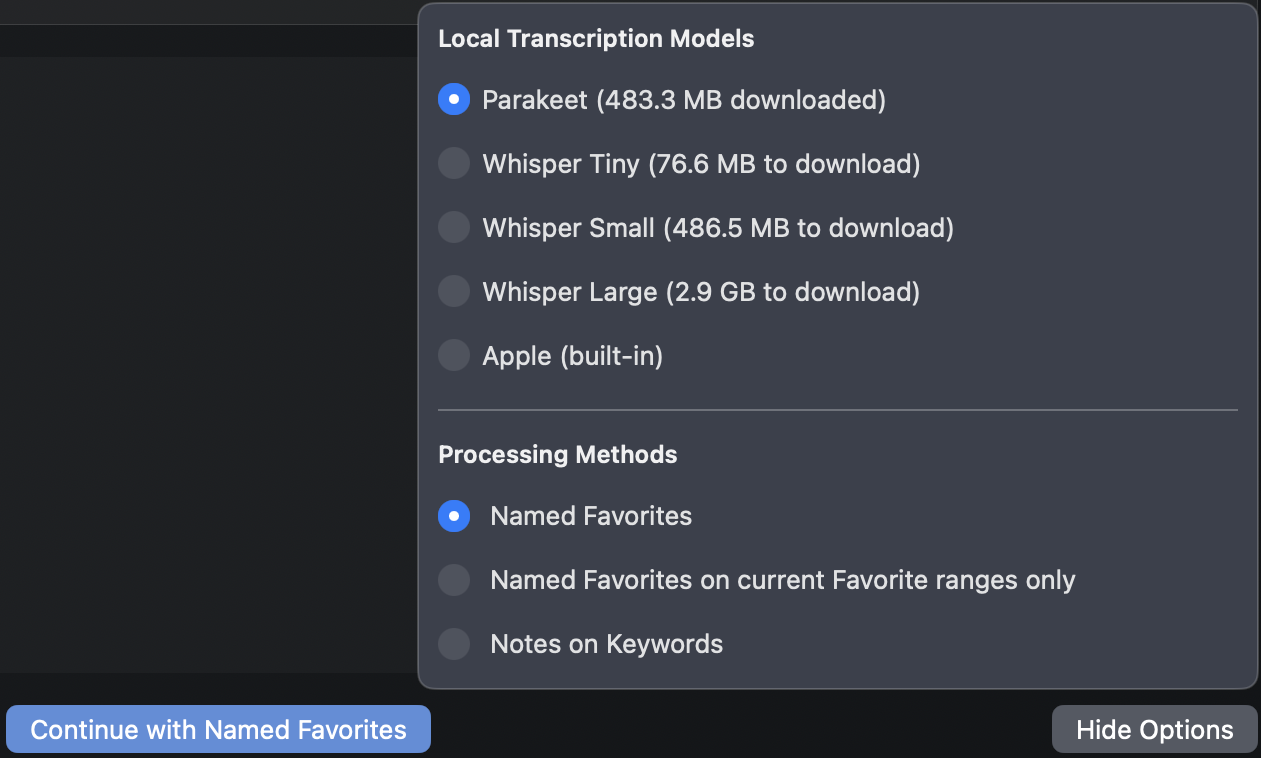
To delete a downloaded model, hold Command and Option, then click on the model you wish to remove.
Press Continue to send the named favorites back to Final Cut Pro. (For alternative workflows, you can press Show Options in the lower right corner — more on those at the end of this page.)
Transcripts are sent to Final Cut Pro
Transcripted versions of your clips will appear in new events with a ⭐️ at the end of the name.
Before you leave ScriptStar, there’s one more optional step.
Optional: Export text transcripts from ScriptStar
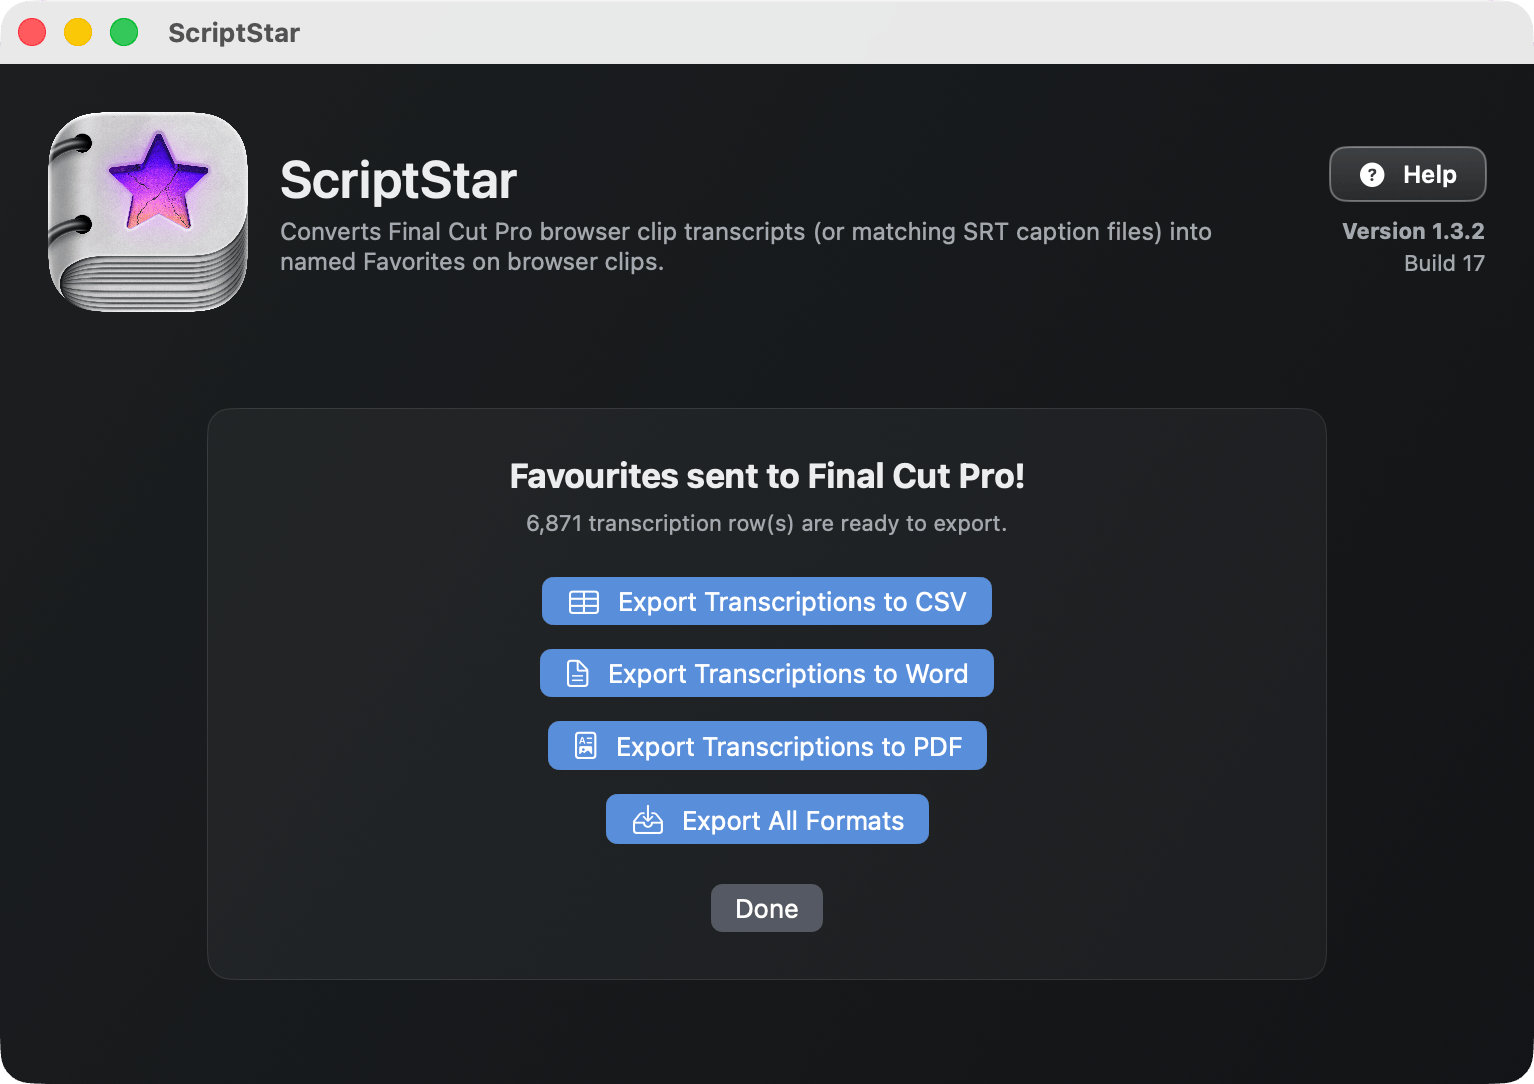
If you want to send your clients a timed transcript, so they can highlight the most important phrases in interviews, or if you'd found it useful yourself, you can now export those transcripts in whatever format suits your workflow.
New in v1.5
Formats include CSV, Word, PDF and SRT, and if you want all four options, press the last button in the list. Note that SRT export produces a separate file for each transcribed clip.
Using the transcripts in Final Cut Pro
Back in Final Cut Pro, look for the events with the ⭐️ in the name, and twirl each clip’s disclosure triangle to see every line of transcribed dialogue.
Select a line, play it back by pressing / (slash), then drag it to a timeline or tap E to append it.
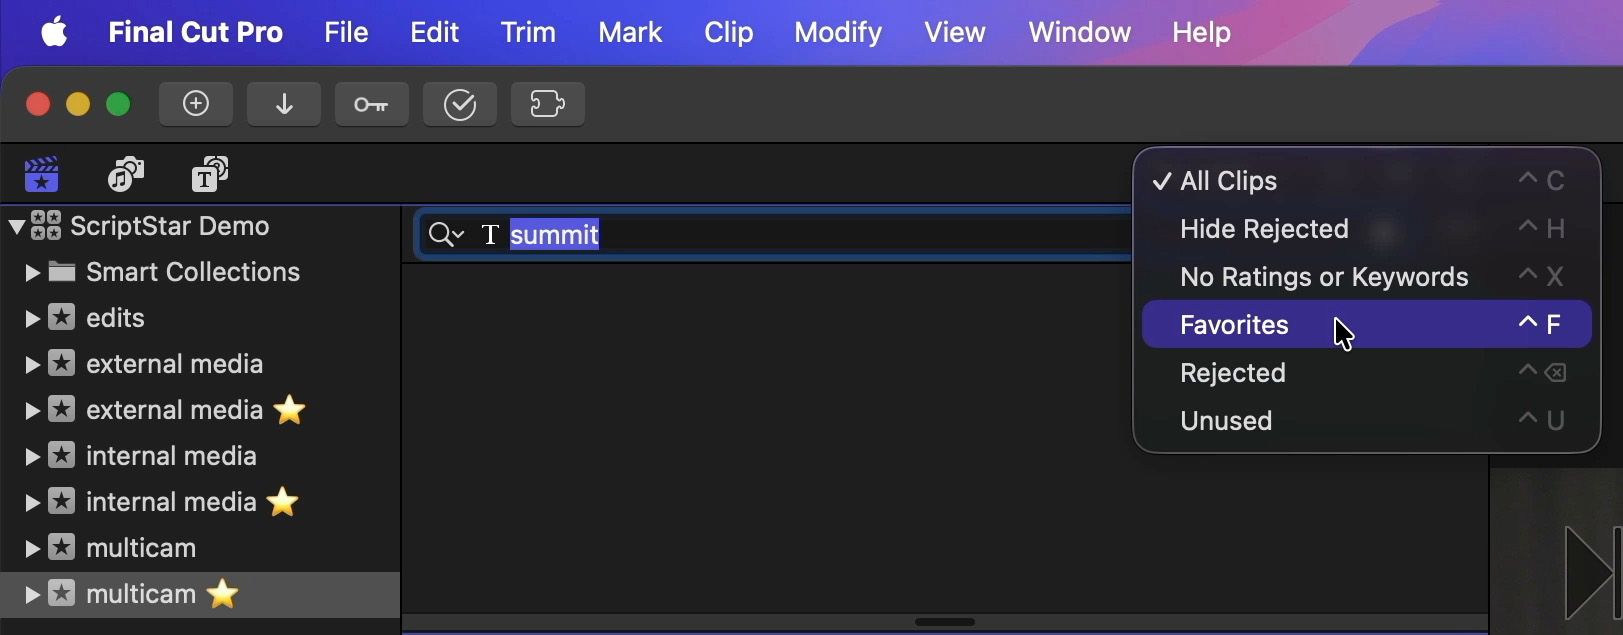
The transcript search in Final Cut Pro still works, but if you want to search through the named favorites, choose Favorites in the Clip Filtering menu. If you don't do this, searches return the entire source clip.
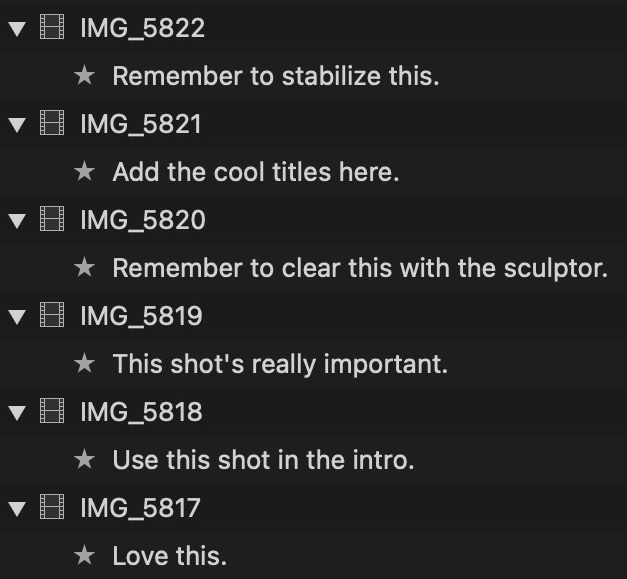
Scriptstar works with regular clips and Multicam clips, and it's a great way to find not just dialogue, but anything said out loud during a shoot.
If something great just happened, or there's anything else you need to remember, say it out loud and you'll see it in your Browser during the edit.
Lastly, if you had already applied Favorite ranges to clips or clip ranges before using ScriptStar, they will be converted into a new keyword called Favorites ⭐️. Each converted event will include this keyword collection, and you can apply this keyword the same way you would have applied favorites before.
For example, you can now select any line of dialogue, then drag it directly into the Favorites ⭐️ keyword collection to tag it.
However, if you wish to continue to use traditional Favorites to organize B-roll clips, while using ScriptStar's transcript favorites and Favorites ⭐️ keywords to organize A-roll clips, that's easy. Simply move these two types of clips into separate events, and don't process the event containing the B-roll clips.
Show Options and Alternative workflows
At the final stage before processing, where SRTs can be added, the Show Options button allows two alternative workflows to be chosen. When you press Show Options, a panel appears with four sections:
- Local Transcription Models
- Transcription Language (Whisper only)
- Processing Methods
- Length Limits
Local Transcription Models
This allows you to choose which model you want to use. This is discussed in the transcription section above, but to recap:
- Parakeet is fastest, supports many languages, and is recommended.
- Whisper is slower, has different models to choose from, supports more languages, and allows a specific language to be chosen.
- Apple's model is fast but not as accurate as the other two.
- Command-Option-click on a model to delete it if you wish.
Transcription Language (Whisper only)
If Automatic language transcription is not correctly selecting the language used in your dialogue, choose the correct language from the menu here. This is only functional when using the Whisper models.
Processing Methods
This section allows you to choose how transcripts are stored within Final Cut Pro, including three options:
- Named Favorites
- Named Favorites on current Favorite ranges only
- Notes on Keywords
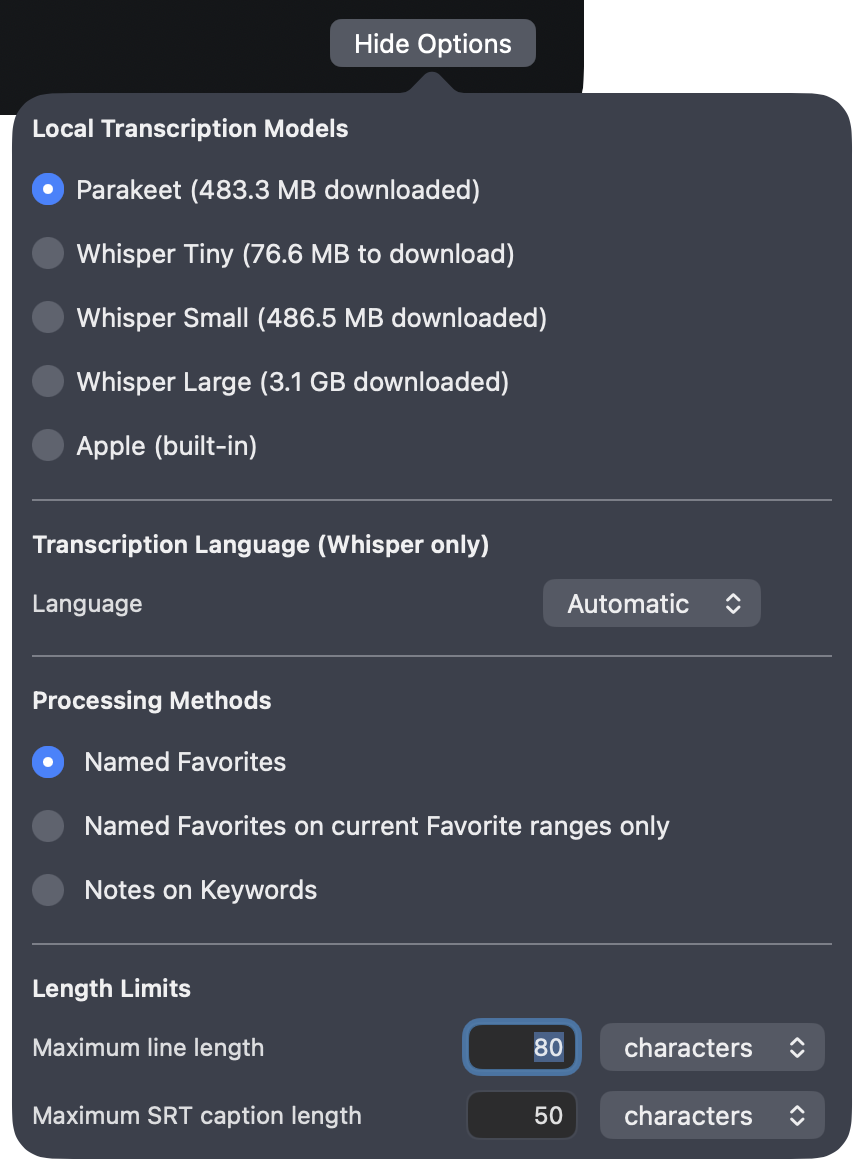
Named Favorites is the default, and will follow the workflow outlined above, placing transcripts onto Named Favorites, and existing Favorites onto the Favorites ⭐️ keyword.
Named Favorites on current Favorite ranges only does just that — it only add transcripts onto ranges of clips where Favorites have already been marked.
This will suit users who like to Favorite their clips before adding transcripts, and who only want to see transcripts in those areas. However, as no transcripts will be added outside these Favorite ranges, it may be harder to find additional lines of dialogue.
Notes on Keywords keeps favorites intact, but it changes the way you’ll need to interact with transcripted clips inside FCP.
We only recommend Notes on Keywords for advanced users.
Instead of using Favorite to store the transcript, this alternate mode makes keyword ranges for each line of dialogue, all with the same name (⭐️) and puts the transcripts on each instance’s notes field.
This means existing Favorites and related functionality are maintained — allowing you to search for Favorites across an entire library — but it has two downsides.
-
The transcript is now in the Notes category, so you’ll have to make sure it’s wide enough to see the transcript. If you were already using clip names to carry information this may leave you a little short of space.
-
Searching for a specific line now uses a different workflow to the Named Favorites mode, in which you simply select “Favorites” in the Clip Filtering menu as you search. In Notes on Keywords mode, you must select the ⭐️ keyword collection (instead of choosing Favorites) to see single lines in search results.
To remind you which way an event was processed, check the suffix after the event name.
- Named Favorites ⭐️
- Named Favorites on current Favorite ranges only ⭐️✅
- Notes on Keywords ⭐️🔑
Length Limits
These controls allow you to control how long ScriptStar's output is, in characters or words:
- Maximum line length
- Maximum SRT caption length
Maximum line length is used when sending information back to FCP. If you've found that transcripts are too long to comfortably read, consider reducing this value. However, because FCP requires a one-frame gap between favorite ranges, we recommend not using a very small value here.
Maximum SRT caption length governs the length of each SRT caption. If you choose 1 word here, each SRT caption will be the length of a single word. When combined with the Convert Caption to Subtitle feature in FCP 12.3, this allows you to create one-word visible captions.
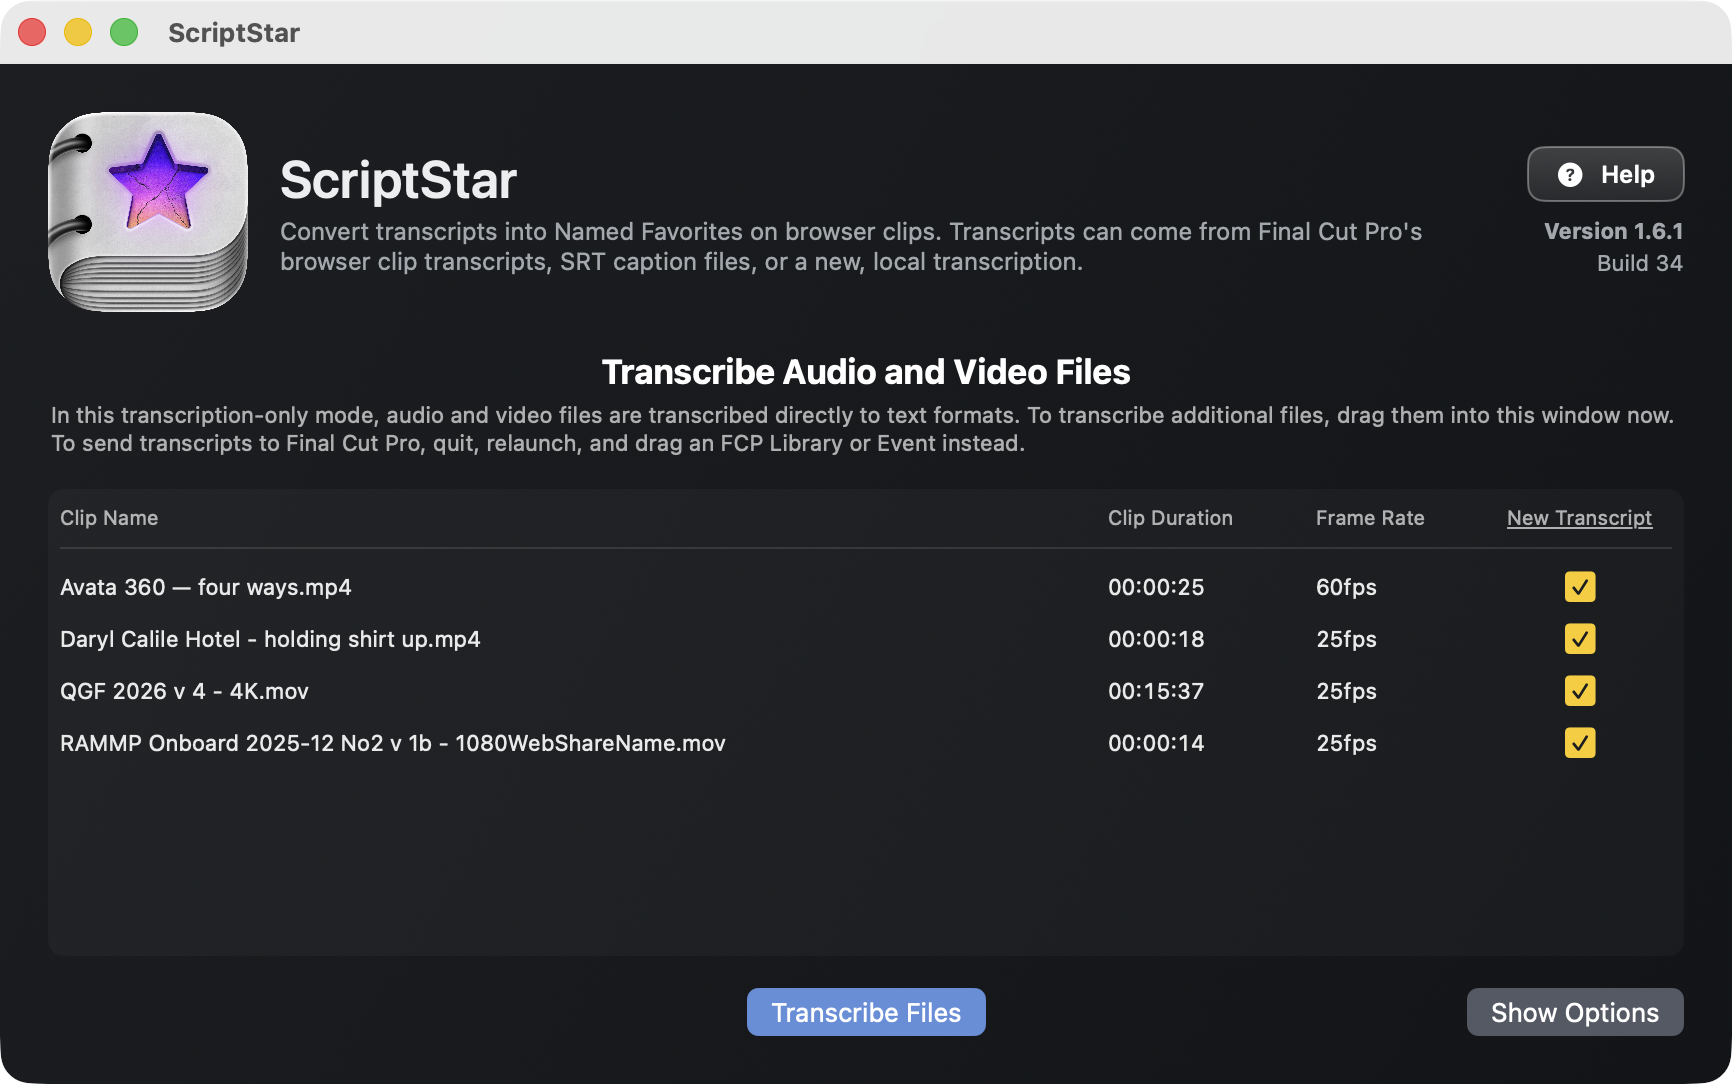
Using ScriptStar without Final Cut Pro
It's possible to use ScriptStar for free, local, and private transcription of any audio or video file. This produces the same timecoded transcripts and SRT files that the FCP-based workflow does, but doesn't send anything back to Final Cut Pro.
This means that ScriptStar can be used by non-editors to transcribe any recording for reference, and by anyone who needs captions for a finished, edited video. To do this:
- Launch the ScriptStar app from the Applications folder.
- Drag one or more audio or video files direct from the Finder into ScriptStar. You will not be asked to choose an event or library.
- If you need to drag in additional files, you can do that now.
- Press the Show Options button in the lower right corner to choose a Transcription Model and set Length Limits. Processing Methods are not relevant in this mode, and are greyed out.
- All clips dragged in will be selected for transcription by default.
- Press Transcribe Files to proceed.
- As in the FCP workflow, if any files fail to be transcribed, a warning will appear, and those files will be unchecked. Press Transcribe Files again to continue without processing those files.
- When transcription is complete, the transcripts can be exported in any or all the usual formats:
CSV,Word,PDFandSRT.
Use ScriptStar to create captions for a finished video project in Final Cut Pro
ScriptStar is usually used to add transcripts to browser clips, but you can also use it to generate captions in a finished project.
- Export the project to any video+audio or audio format.
- Use ScriptStar to create an SRT file from the final video file, independently of FCP, using the workflow shown above.
- Import the SRT captions back into the same timeline using File > Import Captions.
- SRT captions can now be retimed and corrected if necessary. It's always recommended to check final captions before exporting a final SRT from FCP.
Note that SRT captions remain optional for the viewer, and are better for accessibility. However, if you need on-screen visible subtitles burned into the video with controllable font, size and animation, you can do that with a new feature in FCP 12.3. With SRT captions on a timeline:
- Select one caption, then press
COMMAND-A to select all of them. - Right-click one caption, then choose Duplicate Captions to Subtitles.
- To change the style of all subtitles, you can select them, then change the properties in the Inspector. You can also change the title template used by double-click on the title you wish to use instead.